COMMS Antenna Refurbishment
Materials
PocketQube body:
Should already contain all the components of the spacecraft, inluding all the subsystem boards and the battery.
Lateral board with antenna:
The antenna must be already soldered and must have space to add a resistor in the opposite side (as seen in the image).
Resistor:
7.5 Ohm resistor (color code(5 bands): Violet, Green, Black, Silver, Brown)
Dyneema:
Dyneema bought from Decathlon (UHMPE 0.35mm diameter, 26 kg)
Procedure
1. Dyneema
Cut a 40cm piece of dyneema (it is recommended to use heat to cut as it leaves the ends melted and will be useful to tie knots). 40cm will be more than enough and in the end we will have leftover dyneema that we'll have to cut.
2. Solder resistor
We solder the 7.5 ohms resistor in the opposite side of the antenna
The result should look like the previous image.
3. Antenna Knot
1- Bend one of the 2 ends of the cable so that one side is ~5 cm and the other is ~35 cm
2- Pass the cable through the hole previously made in the antenna in such a way that it looks like the following image
3- Pass the 2 ends of the cables inside the hole as you can see in the following image
Here is another example of how it should be done using longer cables:
4- Pull the two ends of the cable until we have a knot left
5- You can trim the end of the rope on the shorter side (although not too much to avoid undoing the knot).
6- Once the first knot is made, we will pull the longest side of the dyneema and wrap it around the satellite until we reach the resistance. In this way the antenna will be "bent" and we can use the resistance as a thermal knife. It is very important to make the antenna bent towards the opposite side of the resistance (in such a way that we have to make a complete turn around the satellite with the rope) to prevent the antenna from taking up more space than allowed.
Here are some images showing how it whould be done, also as a remark the cable used in the images is longer than it should be to help to see how to do the procedure:
4. Resistor Knot
The crossbow knot was selected as it was robust and melted the dyneema in 14 seconds using 3.3V and 450mA. That does not mean that it is the most robust knot that exists. In fact, there are other more robust knots but the disadvantage is that they require more time to melt (that is, more energy).
1- Pull the thread in such a way that the antenna is tensioned and hooked to the sides of the satellite.
2- Pass the dyneema under the resistance so that the thread comes out towards us. The outgoing cable must pass to the right of the incoming cable (as seen in the image).
3- Tension the cable to be sure that the antenna is hooked to the sides.
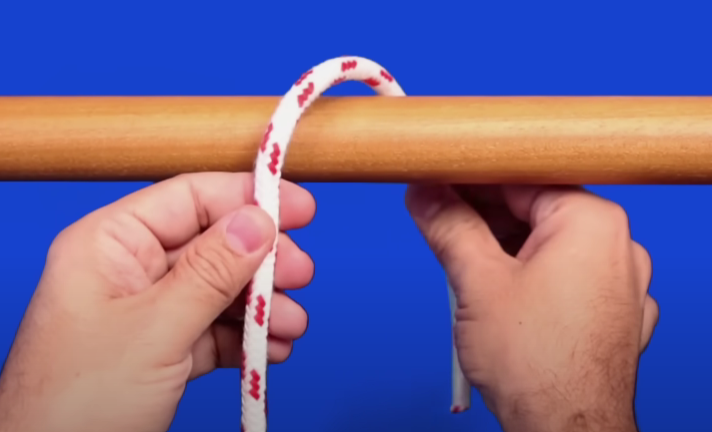
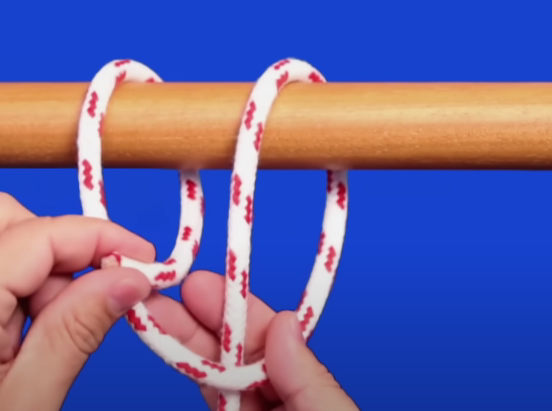
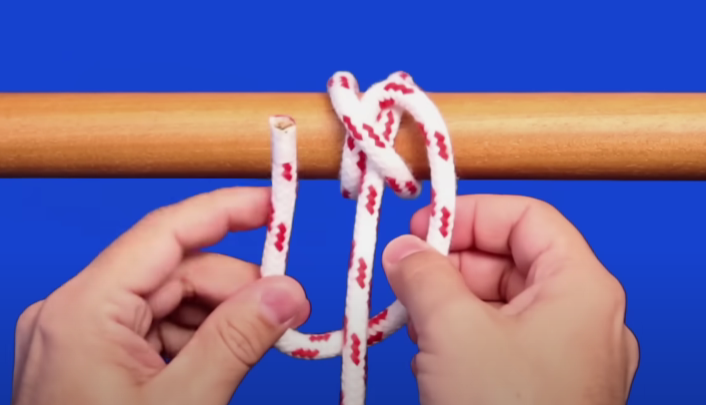
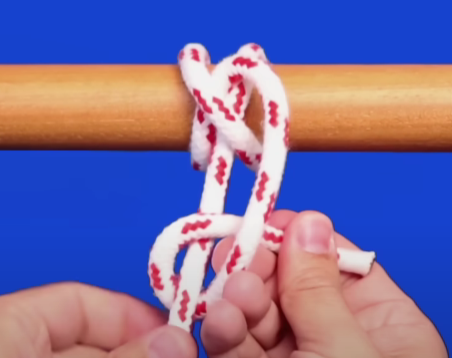
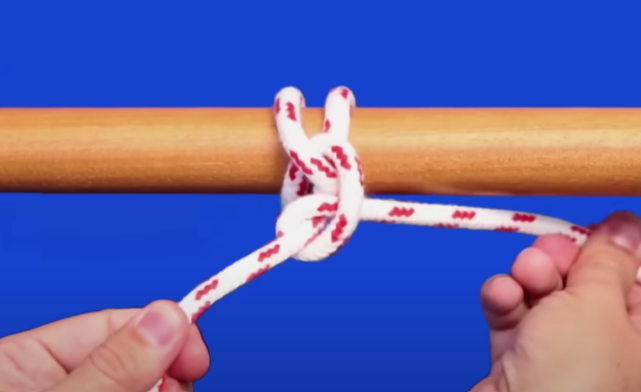
4- Wrap the free end around the standing part of the rope (the part that leads to the rest of the string or object) and then bring it back down through the loop, but this time from the top.
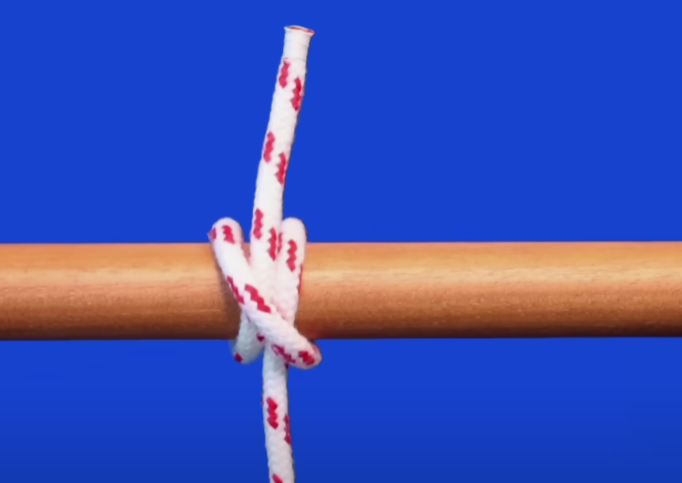
5- Tighten the knot by pulling on the free end.
Here are some images of another tutorial for this knot:
Once completed the dyneema should be tight and the end of the cables can be reduced if necessary.
For extra redundancy, we recommend adding another knot on top of this, here are some images showing how to do so:
The resulting knot should look like this on the PocketQube (again, the double cable is for visualization,only one cable is necessary):
Doing step 1 of the "Antenna Knot" (3) folding in half (instead of just leaving 5cm) results in greater robustness of our knot but increases the melting time of the dyneema to 31 seconds using 3.3V and 450mA.



No Comments